Tortillas
The Most Delicious Taco Night Ever!
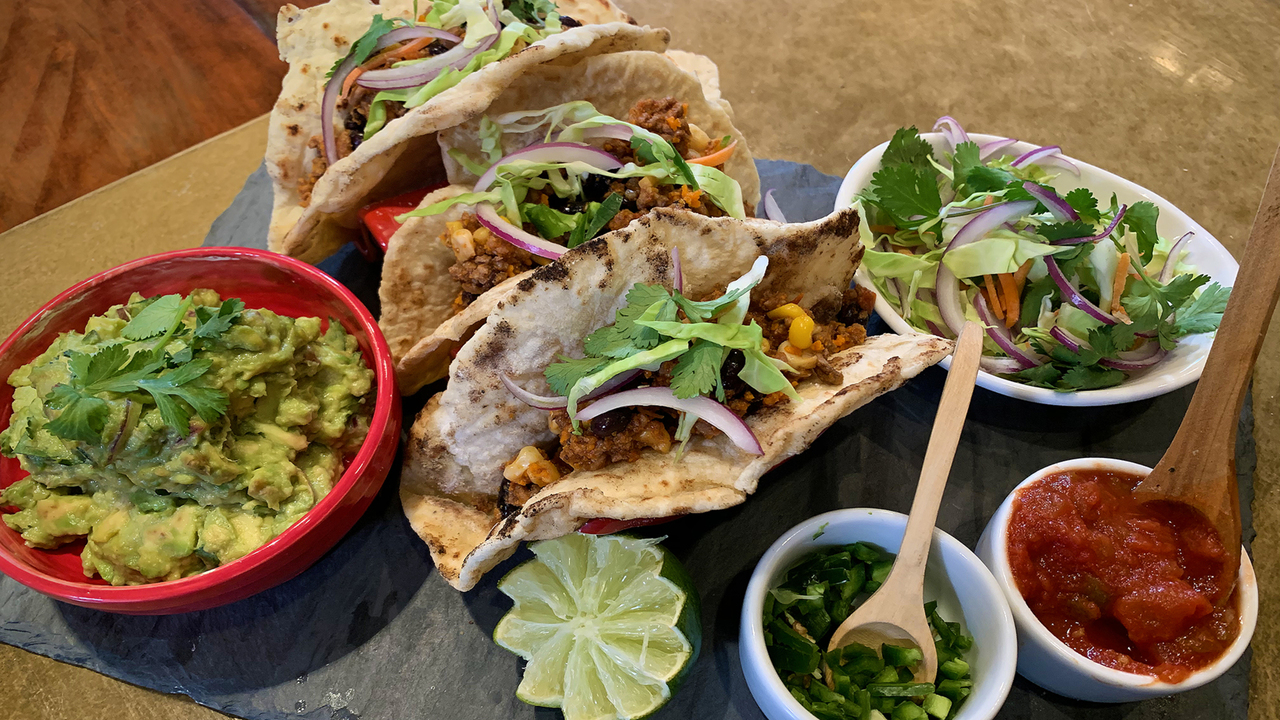
Everyone loves Mexican food, and did you know you can make tortillas that you can cover with your favorite toppings? This recipe has everything you need to make homemade tortillas for tacos and so much more!
Corn Tortillas View Printable Recipe
INGREDIENTS
- 3 cups masarepa or cornflour
- 1 tsp. baking powder
- 1 tsp. salt
- 1 cup hot water
- 1/3 cup vegetable oil, shortening or lard
DIRECTIONS
- In a large bowl, combine flour, baking powder and salt. Whisk briefly to combine. Add vegetable oil; stir until the mixture resembles coarse crumbs. Pour in warm water; stir to combine. Knead briefly with well-floured hands until mixture comes together into a craggy dough.
- Transfer dough from the mixing bowl to a well-floured work surface. Divide into 16 roughly equal portions. Roll out each portion into a ball; flatten slightly with the palm of your hand.
- Cover flattened balls of dough with a clean kitchen towel; let rest for 15 minutes to an hour.
- Warm a heavy-bottomed skillet over medium-high heat. Lightly flour your work surface and rolling pin; roll each dough ball into a circle (about 6” in diameter). Avoid stacking rolled tortillas on top of one another to prevent sticking. Instead, use a lightly floured sheet of parchment paper between each tortilla.
- Transfer tortillas one at a time to the hot skillet. Cook for about 1 minute, until small bubbles form on the top and brown spots form on the bottom. If it takes much longer than a minute to see golden brown spots on the bottom, slightly increase the heat. If the tortilla browns too much or too quickly, reduce the heat. Flip and cook the other side for about 30 seconds.
- Remove from the pan and stack cooked tortillas. Loosely wrap in a clean kitchen towel; this will keep them soft, pliable and warm. Serve immediately or allow to cool for later use.
- Tortillas can be stored for 2-3 days in the fridge in a plastic resealable bag. Before serving, wrap tortillas in a slightly-damp paper towel and microwave for 15-30 seconds.
- Tortillas can also be frozen for 2-3 months. To freeze, separate tortillas with sheets of parchment or wax paper and store in a zip-top freezer bag.
Flour Tortillas View Printable Recipe
INGREDIENTS
- 3 cups all-purpose flour
- 2 tsp. baking powder
- 2 tsp. salt
- 1 cup hot water
- 1/3 cup vegetable oil, shortening or lard
DIRECTIONS
- In a large bowl, combine flour, baking powder and salt. Whisk briefly to combine. Add vegetable oil; stir until the mixture resembles coarse crumbs. Pour in warm water; stir to combine. Knead briefly with well-floured hands until mixture comes together into a craggy dough.
- Transfer dough from the mixing bowl to a well-floured work surface. Divide into 16 roughly equal portions. Roll out each portion into a ball; flatten slightly with the palm of your hand.
- Cover flattened balls of dough with a clean kitchen towel; let rest for 15 minutes to an hour.
- Warm a heavy-bottomed skillet over medium-high heat. Lightly flour your work surface and rolling pin; roll each dough ball into a circle (about 6” in diameter). Avoid stacking rolled tortillas on top of one another to prevent sticking. Instead, use a lightly floured sheet of parchment paper between each tortilla.
- Transfer tortillas one at a time to the hot skillet. Cook for about 1 minute, until small bubbles form on the top and brown spots form on the bottom. If it takes much longer than a minute to see golden brown spots on the bottom, slightly increase the heat. If the tortilla browns too much or too quickly, reduce the heat. Flip and cook the other side for about 30 seconds.
- Remove from the pan and stack cooked tortillas. Loosely wrap in a clean kitchen towel; this will keep them soft, pliable and warm. Serve immediately or allow to cool for later use.
- Tortillas can be stored for 2-3 days in the fridge in a plastic resealable bag. Before serving, wrap tortillas in a slightly-damp paper towel and microwave for 15-30 seconds.
- Tortillas can also be frozen for 2-3 months. To freeze, separate tortillas with sheets of parchment or wax paper and store in a zip-top freezer bag.
Return to the
Amy LaBelle's Cooking with Kids
Main Page
Thanks to our generous sponsors:
AutoFair | Cook, Little, Rosenblatt & Manson | D.F. Richard Energy | Granite State Development Corporation | New England Dairy | Northeast Delta Dental | Stonyfield Organic | Unitil | Enterprise Bank | White Mountains Community College | Monadnock Food Co-op | Macaroni Kid Seacoast
About Founder, Co-Owner and Winemaker, Amy LaBelle

Amy LaBelle is the founder and winemaker at LaBelle Winery. Formerly a corporate attorney practicing in Massachusetts and New Hampshire, her lifelong interest in wine led her to open LaBelle Winery to pursue her passion for winemaking.
Amy is serious about her mission to provide customers with the very best culinary and wine experience, as her philosophy is to treat guests of LaBelle Winery like family. Her ultimate vision is to give back to the community through charitable giving in ways that are fulfilling, impactful and meaningful, and to grow her business exponentially so that she can contribute more.
Love of learning, dedication, integrity, love of craft, innovation and passion is her formula for success. Every day matters and Amy tries never to waste her days. Amy’s paramount success is being able to grow LaBelle Winery with her husband, Cesar Arboleda, while also balancing life with their two sons.
Amy is also the founder of Empowering Angels, a charitable organization that empowers girls and young women to embrace the possibility of entrepreneurship. The program provides education in basic business skills and strategies and through providing women role models by which these aspiring young entrepreneurs can model their behavior.
Amy serves on the NHPBS Board of directors and lives with her husband, and co-owner of LaBelle Winery, Cesar Arboleda, and their two sons, Jackson Alejandro Arboleda and Lucas Cesar Arboleda.
Printable Recipes!
- Corn Tortillas
- Flour Tortillas
- Homemade Meatballs
- Homemade Pasta Dough
- Homemade Pizza Dough
- Ricotta Filling
- Triple Citrus Lemonade
- Vinaigrette
Kid-friendly Recipes
from New England Dairy
- Homemade Yogurt
- PB&J Frozen Yogurt Bark
- Pizza Grilled Cheese
- Ham & Cheese Muffins
- Butternut Squash Shells & Cheese
- Squeeze Freeze Ice Cream
- Colorful Smoothie Recipes
- Taco Stacker
- Creamy Herb Yogurt Dressing for Veggie Sticks

